I finished the Sayer tank just in time for my holiday in Crete, and it is a perfect piece for this glorious place.

Sayer is designed by Julie Hoover. She is a designer I have admired for some time and I am happy to have finally knit one of her pieces. She has a very simple, spare style, with easy shapes and loose, but well-tailored, fits.

I knit this using Ito Kinu, which I purchased at Loop in London. Here is its description from Loop’s website: “KINU is a 100% silk noil yarn, also called organic silk, as it is produced from the leftovers of spun filament silk. Differently colored fibers are blended for this silk noil yarn, to produce a melange effect.” I used the shade Hydrangea, and it was knit with the yarn held double. It makes an excellent fabric, which is cool in the hot sun.

I followed the pattern exactly. It is all stockinette knitting and would be an easy piece for a beginner to knit. I knit most of it while I was in Malaysia; it is a good project for travel knitting. I thought about changing the edging because it didn’t feel or look right while I was knitting it, but once done I thought it was brilliant.

The two photos above were taken at our B&B in Milatos (see below for details); the first is from our balcony looking out to the sea.
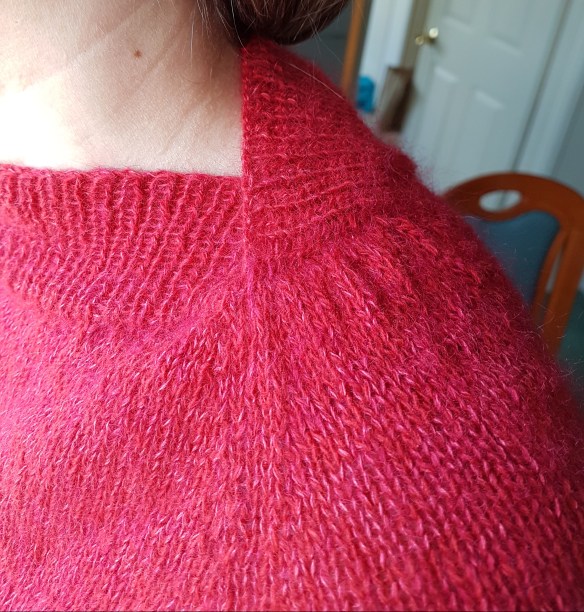
Here you can see the edging at the V-neck:

This tank is designed to be reversible; you can wear it with the V-neck in front and the crew neck in the back (as in most of these photos) or you can wear it the other way, with the crew neck in the front and the V-neck in the back (as seen in the three photos below).
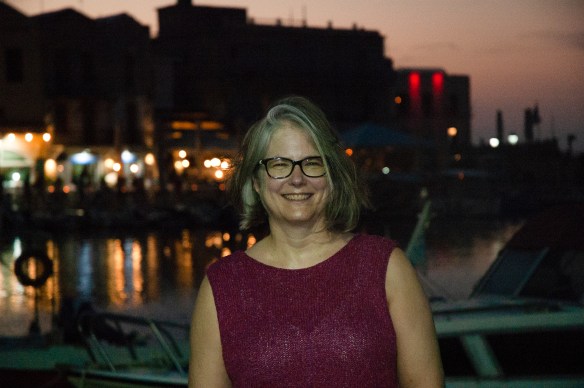
These photos were taken in the evening at the harbour in Rethymno. There is not much light but I think they show off the tank really well nonetheless. The sun is so strong here that only photos taken in the early morning and early evening work well.

You can probably tell from these photos that I was having a really great time in Rethymno. We are on holiday with our dear friends, Theo and Jonathan, and these evening photos were taken by Jonathan. We were clearly having fun.

Behind me is the harbour. Just in front of me there is a lighthouse. The harbour was filled with tourists taking photos of people with the lighthouse behind them; it is obviously a popular photo spot. We bucked the trend and shot in the other direction! All of the tourists were probably wondering why we were ignoring the obvious photo opp right in front of us. (We aim to be different.)
Crete is full of flowers right now, many of which match my tank. Doug took this photo in front of a doorway in Rethymno (and also provided the terrible pun in the title of this post):

If you are interested in a very wearable, A-line tank, I would highly recommend this one. It is well-designed, the pattern is well-written, and it is trouble-free knitting. You can wear it for breakfast, for sight seeing or for an evening out on the town. (Here I am sitting having breakfast at our lovely B&B hotel, the Milatos Village Cretan Agrotourism Hotel. It is a wonderful place and the hosts, Kat and Alice, made us feel right at home! The breakfast spread, by the way, is gorgeous and plentiful – I had not yet gotten started on it when Doug took this shot.)

The photo at the top of the post was taken by Jonathan at the Arkady Monastery, which is so beautiful that no words can properly describe it. If you have a chance, go see it.
Make this tank! It will make you smile. It may even make you laugh with joy!